Craving a succulent steak with a beautiful sear and juicy interior, but don’t have an outdoor grill or prefer the convenience of indoor cooking? An electric grill can be your secret weapon to achieving steakhouse-quality results right in your kitchen. While often lauded for their ease of use, mastering the electric grill for steak requires specific techniques to unlock its full potential. This comprehensive guide will walk you through every step, from selecting the right cut to the final, crucial resting period, ensuring you cook the perfect steak every time.
Overview of Electric Grills
An electric grill is a versatile cooking appliance that uses electricity to heat a cooking surface, providing a convenient alternative to traditional charcoal or gas grills. Designed for both indoor and outdoor use, these grills aim to replicate the high-heat searing and characteristic grill marks of their counterparts, often with less smoke and easier cleanup.
The market offers various types of electric grills, each catering to different needs. Indoor electric grills typically include countertop models, often with contact plates that cook both sides of the food simultaneously, and open-plate models that mimic a traditional grate. Outdoor electric grills are larger, freestanding units designed for patios and balconies where open flames might be restricted. A growing segment is smokeless electric grills, which incorporate features like water trays or integrated fans to minimize smoke output, making them ideal for apartment living or any indoor setting. The evolution of electric grills has brought increasingly powerful and precise models, capable of reaching temperatures suitable for searing, making them a viable option for steak enthusiasts.
Advantages and Disadvantages of Electric Grills for Steak
Electric grills offer a unique set of pros and cons when it comes to cooking steak, shaping the culinary experience. Understanding these aspects helps in maximizing your grill’s potential and managing expectations.
Advantages:
- Convenience and Ease of Use: Electric grills are incredibly simple to operate. Just plug them in, preheat, and start cooking. Their straightforward design makes them accessible for cooks of all skill levels, eliminating the need for charcoal, lighter fluid, or propane tanks.
- Precise Temperature Control: Most electric grills come with adjustable temperature settings, allowing for exact heat management. This precision is invaluable for cooking steak to your desired doneness, from a quick sear to a more controlled cook through.
- Safety: Without an open flame, electric grills significantly reduce the risk of flare-ups and grease fires, making them a safer option, especially for indoor use or in areas with fire restrictions.
- Suitable for Small Spaces and Indoors: Compact designs and smokeless technology mean electric grills are perfect for apartments, small kitchens, or any space where traditional grilling is impractical. You can enjoy grilled steak regardless of the weather outside.
- Even Cooking: The heating elements in electric grills often provide consistent heat distribution across the cooking surface, which helps in cooking steak uniformly without troublesome hot spots.
|
Our Picks for the Best electric grill in 2026
As an Amazon Associate I earn from qualifying purchases.
|
||
| Num | Product | Action |
|---|---|---|
| 1 | Chefman XL Electric Griddle with Removable Temperature Control, Immersible Flat Top Grill, Burger, Eggs, Pancake Griddle, Nonstick Extra Large Cooking Surface, Slide Out Drip Tray, 10 x 20 Inch |

|
| 2 | Electric Grill, Techwood Indoor/Outdoor Electric BBQ Grill, 1600W Portable Removable Stand Grill with Adjustable Heat & Drip Tray, Double Layer Design for Party, Patio & Backyard (Blue) |
|
| 3 | Electric Grill, Techwood Indoor/Outdoor Electric BBQ Grill, 1600W Portable Removable Stand Grill with Adjustable Heat & Drip Tray, Double Layer Design for Party, Patio & Backyard (Black) |
|
| 4 | Ninja DG551 Foodi Smart XL 6-in-1 Indoor Grill with Air Fry, Roast, Bake, Broil, & Dehydrate, Foodi Smart Thermometer, 2nd Generation, Black/Silver |
|
| 5 | Ninja Griddle and Indoor Grill, 14’’, Electric Grill, For Steak, Burgers, Salmon, Veggies, and More, Pancake Griddle, Nonstick, Dishwasher Safe, 500F, Even Cooking, Silver, GR101 |
|
| 6 | Chefman Electric Smokeless Indoor Grill w/ Non-Stick Cooking Surface & Adjustable Temperature Knob from Warm to Sear for Customized BBQing, Dishwasher Safe Removable Water Tray, Black |
|
| 7 | Artestia 1800W Electric Outdoor Grills with Lid Indoor Smokeless Grill for Balcony with Temperature Control Portable Removable Stand Grill for Cooking, BBQ Party, Family |
|
| 8 | Hamilton Beach Electric Indoor Searing Grill with Viewing Window & Adjustable Temperature Control to 450F, 118 sq. in. Surface Serves 6, PFAS-Free Removable Nonstick Grate, Stainless Steel |
|
| 9 | Electric Grill, CUSIMAX Electric Indoor/Outdoor Grill, 1600W Portable BBQ with Lid for Indoor & Outdoor Use, Adjustable Heat, Removable Stand Grill for Cookouts, BBQ Gatherings, Small Spaces |
|
| 10 | Chefman Smokeless Indoor Electric Grill, Extra Large Grilling Surface, Nonstick Table Top Grill for Indoor Grilling and BBQ with Adjustable Temperature Control, Drip Tray, Dishwasher-Safe Parts |
|
Disadvantages:
- Flavor Profile Differences: The absence of charcoal or wood smoke means electric grills typically don’t impart the same smoky flavor characteristic of traditional outdoor grilling. While seasonings can compensate, some grilling purists may miss that distinct smokiness.
- Searing Power Limitations: Achieving a deep, dark, flavorful crust (the Maillard reaction) on an electric grill can sometimes be challenging. Some models may not reach sufficiently high temperatures, or may lose heat quickly when cold meat is added, resulting in a less intense sear compared to a screaming hot cast-iron pan or gas grill.
- Reliance on Power Outlet: An electric grill needs a dedicated power source, which might limit placement options and portability, especially for outdoor models.
- Cooking Capacity: Many indoor electric grills have smaller cooking surfaces, which can be restrictive when cooking for larger groups or preparing multiple steaks simultaneously.
Preparing Your Steak for the Electric Grill
The journey to a perfect electric grill steak begins long before it hits the grates. Proper preparation is essential to ensure maximum flavor and optimal cooking.
Choosing the Right Steak Cut and Thickness
Selecting the right cut of steak is paramount. Opt for well-marbled cuts like Ribeye, New York Strip, or Filet Mignon for rich flavor and tenderness. The marbling (intramuscular fat) will melt during cooking, keeping the steak moist and flavorful. Aim for a thickness of 1 to 1.5 inches (2.5 to 3.8 cm). Thicker cuts offer more control over doneness, allowing for a good sear without overcooking the interior, while thinner cuts risk drying out quickly.
Bringing Steak to Room Temperature
Allow your steak to sit at room temperature for 30 to 60 minutes before grilling. This step ensures that the steak cooks more evenly from edge to center. Cooking a cold steak directly from the refrigerator can lead to an overcooked exterior and a cool, undercooked interior.
Patting the Steak Dry
This is a critical, often overlooked step. Use paper towels to thoroughly pat both sides of your steak dry. Any surface moisture will create steam on the hot grill, preventing a proper sear and leading to a “gray” exterior instead of a delicious brown crust. A dry surface is key for the Maillard reaction to occur, which is responsible for that desirable browned flavor and texture.
Seasoning Generously
Seasoning should be done generously. For most steaks, a liberal application of coarse sea salt and freshly ground black pepper is often all you need. Apply the seasoning evenly to both sides and the edges. Some experts recommend seasoning at least 30 minutes to an hour before cooking, or even just before, to allow the salt to draw out moisture and then reabsorb, intensifying the flavor.
Optional: Marinating Your Steak
Marinades can add significant flavor and help tenderize tougher cuts. A good marinade often includes a balance of acid (lemon juice, vinegar), oil (olive oil), and aromatics (garlic, herbs), along with savory elements like soy sauce or Worcestershire sauce. Marinate steaks for at least 30 minutes or up to several hours in the refrigerator. Be cautious with highly acidic marinades, as they can start to “cook” or denature the meat if left for too long, potentially altering the texture.
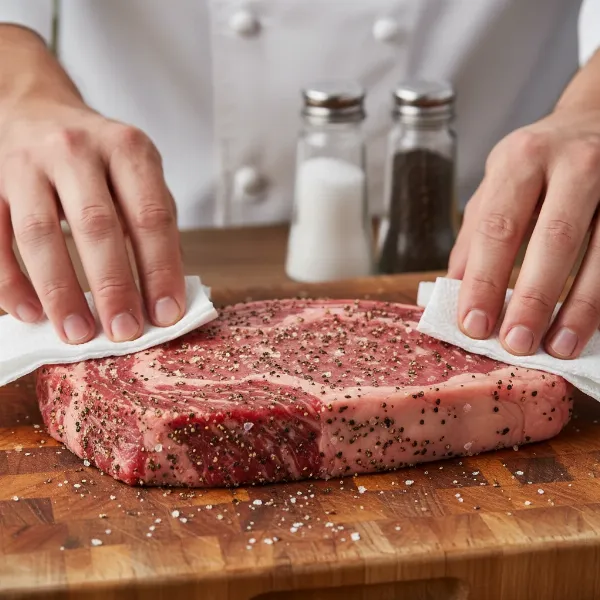 A chef's hands patting a raw, seasoned steak dry on a cutting board, preparing it for an electric grill.
Step-by-Step Guide to Cooking Steak on an Electric Grill
Follow these steps closely to ensure your electric grill delivers a perfectly cooked steak with a delicious crust and juicy center.
1. Preheat Your Electric Grill
Preheating is the most crucial step for a great sear. Turn your electric grill on and set it to its highest temperature setting, typically between 450°F and 550°F (232°C to 288°C). Allow it to preheat for a solid 10 to 15 minutes. A properly preheated grill ensures immediate searing contact and helps create those coveted grill marks. You can test the heat by holding your hand a few inches above the grates; it should be too hot to hold for more than 2-3 seconds.
2. Prepare the Grill Surface
While the grill is preheating, lightly oil the grates. You can do this by folding a paper towel, dipping it in a high smoke point oil (like grapeseed, avocado, or canola oil), and using tongs to carefully wipe the hot grates. This helps prevent the steak from sticking and contributes to a better sear.
3. Place Steak on the Grill
Once the grill is screaming hot, carefully place your seasoned and dried steak onto the grates. Ensure there’s enough space between steaks if cooking multiple pieces to maintain consistent heat. Avoid overcrowding the grill, which can lower the surface temperature and lead to steaming rather than searing.
4. Sear the Steak
Allow the steak to sear undisturbed for 3 to 4 minutes per side. Resist the urge to press down on the steak, as this squeezes out valuable juices. For distinct crosshatch grill marks, you can rotate the steak 45 degrees halfway through the searing time on each side. The goal here is to develop a deep, caramelized crust.
5. Check for Doneness
This is where a reliable instant-read meat thermometer becomes your best friend. Insert the thermometer horizontally into the thickest part of the steak, avoiding any bone. Remove the steak from the grill when it reaches about 5-10°F (3-5°C) below your desired final temperature, as it will continue to cook during the resting period (carryover cooking).
Here’s a guide to internal temperatures for various doneness levels (after resting):
- Rare: 120-125°F (49-52°C)
- Medium-Rare: 130-135°F (54-57°C)
- Medium: 140-145°F (60-63°C)
- Medium-Well: 150-155°F (66-68°C)
- Well-Done: 160°F+ (71°C+)
6. Rest the Steak
Once removed from the grill, place the steak on a clean plate or cutting board and tent it loosely with aluminum foil. Let it rest for 5 to 10 minutes. This allows the juices, which have been pushed to the center of the steak during cooking, to redistribute throughout the meat, resulting in a significantly more tender and juicy bite. Cutting into the steak too soon will cause these precious juices to run out, leaving you with a drier result.
Common Mistakes to Avoid When Grilling Steak on an Electric Grill
Even seasoned home cooks can make errors. Steering clear of these common pitfalls will dramatically improve your electric grill steak.
- Not Preheating Enough: The most frequent mistake. An insufficiently hot grill won’t create a good sear, leading to a pale, under-crusted steak. Always allow your grill to reach its maximum temperature for at least 10-15 minutes.
- Cooking a Cold Steak: Placing a steak directly from the refrigerator onto the grill results in uneven cooking. The outside will overcook while the inside struggles to reach the target temperature. Bring your steak to room temperature for even heat penetration.
- Not Patting the Steak Dry: Moisture is the enemy of a good sear. A wet steak will steam instead of brown, preventing the formation of that delicious caramelized crust. Always pat your steak thoroughly dry with paper towels.
- Under-Seasoning: Steak needs a generous amount of seasoning, especially salt, to truly bring out its flavor. Don’t be shy with salt and pepper.
- Flipping Too Early or Too Often: While some techniques advocate for frequent flipping, constantly moving the steak before a crust has formed will prevent a proper sear. Let the steak develop a solid crust on one side before flipping.
- Piercing the Steak with a Fork: Avoid using a fork to flip or check the steak’s doneness. Piercing the meat allows flavorful juices to escape, leading to a drier steak. Use tongs instead.
- Not Using a Meat Thermometer: Guessing doneness by eye or touch is unreliable. An instant-read meat thermometer is the only way to accurately measure the internal temperature and achieve your desired level of doneness consistently.
- Skipping the Resting Period: Cutting into your steak immediately after grilling will cause all the accumulated juices to spill out. Resting allows these juices to redistribute, resulting in a far more tender and juicy steak.
- Overcooking: While personal preference varies, most steak lovers agree that overcooked steak (past medium-well) becomes dry and tough. Aim for medium-rare to medium for the best texture and flavor.
Tips for an Even Better Electric Grill Steak
Elevate your electric grill steak from good to unforgettable with these additional tips and techniques.
- Consider a Reverse Sear: If your electric grill can maintain a lower temperature (around 250-300°F / 120-150°C), try a reverse sear. Cook the steak at the lower temperature until it’s about 10-15°F (5-8°C) below your target internal temperature, then crank the grill to its highest setting for a quick, aggressive sear on both sides. This method ensures uniform doneness and a fantastic crust.
- Achieve Perfect Grill Marks: For attractive crosshatch grill marks, place your steak on the hot grates, cook for about 2 minutes, then rotate it 45 degrees without flipping. Cook for another 2 minutes, then flip the steak and repeat the process on the other side. This creates striking diamond patterns.
- Keep the Lid Closed: If your electric grill has a lid, keep it closed as much as possible while cooking. This traps heat, allowing the steak to cook more evenly and efficiently, and contributes to a better sear by maintaining a consistent high temperature.
- Butter Basting (Optional): During the last minute of grilling, you can add a pat of butter (or a compound butter with herbs like rosemary and thyme) to the top of the steak. The melting butter will baste the steak, adding richness and enhancing flavor.
- Thicker Cuts for Control: While 1 to 1.5 inches is a good starting point, using slightly thicker cuts (up to 2 inches) can give you more control, especially if your grill struggles with very high, sustained heat. The extra thickness allows more time for searing without overcooking the center.
- Clean Grates: Always start with a clean grill. Leftover food particles can cause sticking and uneven cooking. Preheating helps burn off residue, and a quick brush before oiling is always a good practice.
 A perfectly cooked medium-rare steak on an electric grill with prominent grill marks.
Conclusion
Cooking a perfect steak on an electric grill is entirely within your reach. By understanding the nuances of your appliance and adhering to fundamental techniques—from meticulous preparation and precise temperature management to the all-important resting period—you can consistently achieve a steak that rivals those cooked on traditional outdoor grills. While the electric grill offers convenience and versatility, especially for indoor use, it demands attention to detail to deliver that sought-after combination of a flavorful crust and a tender, juicy interior. Don’t be afraid to experiment with different cuts, marinades, and doneness levels to discover your personal perfect steak.
What’s your favorite cut of steak to grill on your electric grill, and what’s your go-to seasoning?
Frequently Asked Questions
What temperature should an electric grill be for steak?
For optimal searing and to achieve a delicious crust, your electric grill should be preheated to its highest setting, typically between 450°F and 550°F (232°C to 288°C). Allow it to preheat for 10-15 minutes to ensure the surface is consistently hot enough to create the Maillard reaction.
How long does it take to cook a 1-inch steak on an electric grill?
For a 1-inch thick steak aiming for medium-rare, you’ll typically cook it for about 3-4 minutes per side at high heat (450-550°F). However, always rely on an instant-read meat thermometer to verify internal temperature, removing it 5-10°F below your target doneness to account for carryover cooking.
Do you close the lid on an electric grill when cooking steak?
Yes, it’s generally recommended to keep the lid closed on your electric grill when cooking steak. Closing the lid helps to trap and maintain a consistent high temperature, promoting more even cooking and contributing to a better sear. It mimics the enclosed environment of traditional outdoor grills.
Why is my steak gray on an electric grill?
A gray steak typically indicates that the grill surface wasn’t hot enough, or the steak wasn’t properly patted dry before cooking. Insufficient heat prevents the Maillard reaction (browning), and excess moisture causes the steak to steam instead of sear. Ensure thorough preheating and a dry steak for a golden-brown crust.
Can I use a cast iron skillet on an electric grill for a better sear?
While you can use a cast iron skillet on some electric grills to enhance searing, it depends on your specific grill’s design and power. Cast iron retains heat exceptionally well, which can compensate for a grill that struggles with very high temperatures. Place the skillet on the electric grill and preheat it for an extended period until screaming hot before adding your steak.