The sight of perfectly seared food, crisscrossed with dark, inviting grill marks, is a hallmark of delicious outdoor cooking. For many, these marks are more than just aesthetic; they promise a rich flavor and satisfying texture. But if you’ve transitioned to an electric grill for its convenience and indoor versatility, you might wonder: can these modern marvels truly deliver those coveted grill marks? The answer, unequivocally, is yes, and understanding the science and technique behind them can transform your electric grilling experience.
The Science Behind Grill Marks on Electric Grills
Grill marks are a direct result of two chemical reactions: the Maillard reaction and caramelization. The Maillard reaction occurs when amino acids and reducing sugars in food react under high heat, creating hundreds of new flavor compounds and a browned crust. Caramelization, a similar process, focuses on the browning of sugars, intensifying their sweetness and complexity.
On a grill, these reactions happen intensely where the food directly contacts the hot grill grates. The raised ridges of the grates become superheated, transferring high, direct heat to specific points on your food. This localized heat creates the distinct dark lines we recognize as grill marks, while the areas between the grates receive less direct heat, cooking more gently. Electric grills are designed with heating elements that can bring these grates to the necessary high temperatures, often exceeding 400°F (204°C) and some even reaching over 500-600°F (260-315°C), which is crucial for successful searing.
Unlocking Perfect Grill Marks: Techniques and Tips
Achieving those picture-perfect grill marks on an electric grill is entirely possible with the right approach. It’s less about the fuel source and more about mastering fundamental grilling techniques.
Proper Preheat is Paramount
|
Our Picks for the Best electric grill in 2026
As an Amazon Associate I earn from qualifying purchases.
|
||
| Num | Product | Action |
|---|---|---|
| 1 | Electric Grill, CUSIMAX Electric Indoor/Outdoor Grill, 1600W Portable BBQ with Lid for Indoor & Outdoor Use, Adjustable Heat, Removable Stand Grill for Cookouts, BBQ Gatherings, Small Spaces |

|
| 2 | Electric Grill, Techwood Indoor/Outdoor Electric BBQ Grill, 1600W Portable Removable Stand Grill with Adjustable Heat & Drip Tray, Double Layer Design for Party, Patio & Backyard (Black) |
|
| 3 | Artestia 1800W Electric Outdoor Grills with Lid Indoor Smokeless Grill for Balcony with Temperature Control Portable Removable Stand Grill for Cooking, BBQ Party, Family |
|
| 4 | Chefman XL Electric Griddle with Removable Temperature Control, Immersible Flat Top Grill, Burger, Eggs, Pancake Griddle, Nonstick Extra Large Cooking Surface, Slide Out Drip Tray, 10 x 20 Inch |
|
| 5 | Electric Grill, Techwood Indoor/Outdoor Electric BBQ Grill, 1600W Portable Removable Stand Grill with Adjustable Heat & Drip Tray, Double Layer Design for Party, Patio & Backyard (Blue) |
|
| 6 | Ninja DG551 Foodi Smart XL 6-in-1 Indoor Grill with Air Fry, Roast, Bake, Broil, & Dehydrate, Foodi Smart Thermometer, 2nd Generation, Black/Silver |
|
| 7 | Chefman Electric Smokeless Indoor Grill w/ Non-Stick Cooking Surface & Adjustable Temperature Knob from Warm to Sear for Customized BBQing, Dishwasher Safe Removable Water Tray, Black |
|
| 8 | Ninja Griddle and Indoor Grill, 14’’, Electric Grill, For Steak, Burgers, Salmon, Veggies, and More, Pancake Griddle, Nonstick, Dishwasher Safe, 500F, Even Cooking, Silver, GR101 |
|
| 9 | Chefman Smokeless Indoor Electric Grill, Extra Large Grilling Surface, Nonstick Table Top Grill for Indoor Grilling and BBQ with Adjustable Temperature Control, Drip Tray, Dishwasher-Safe Parts |
|
| 10 | Hamilton Beach Electric Indoor Searing Grill with Viewing Window & Adjustable Temperature Control to 450F, 118 sq. in. Surface Serves 6, PFAS-Free Removable Nonstick Grate, Stainless Steel |
|
The most critical step to producing distinct grill marks is adequate preheating. Turn your electric grill on and allow it to preheat for at least 10 to 15 minutes, or until it reaches its maximum temperature. Many electric grills come with indicator lights that signal when they are ready. This ensures the grates are intensely hot, capable of initiating the rapid browning needed for marks.
Oil Your Grates (Not Your Food)
Lightly brush or spray a high smoke point oil, such as vegetable or grapeseed oil, directly onto the preheated grill grates. This creates a non-stick surface, helping the food release cleanly and ensuring the marks form crisply. Oiling the food itself can sometimes lead to excess smoke, especially indoors.
Strategic Food Placement and Rotation
Once your grill is searing hot and lightly oiled, place your food directly onto the grates. Resist the urge to move it immediately. Allow the food to sear undisturbed for several minutes. The food will naturally release from the grates when a proper crust has formed. For classic crosshatch grill marks, cook one side until defined marks appear, then rotate the food 45 degrees and cook for another couple of minutes before flipping to the other side.
Room Temperature Matters
For thicker cuts of meat, allowing them to come to room temperature for 15-20 minutes before grilling can promote more even cooking and better searing. Cold meat hitting hot grates can sometimes cool the surface too quickly, hindering mark formation.
Types of Electric Grills and Their Searing Capability
The ability to create grill marks varies among electric grills, largely depending on their design and heating power.
Indoor Contact Grills
Many indoor electric grills, like some George Foreman models, operate as contact grills, pressing food between two heated plates. While these can produce grill marks on both sides simultaneously, the marks are often less defined and can resemble those from a panini press, as the food is compressed.
Open-Grate Electric Grills
For more authentic, outdoor-style grill marks, open-grate electric grills are generally superior. These models feature a single cooking surface with raised grates, mimicking traditional charcoal or gas grills. Look for features like:
- High Wattage: Higher wattage typically translates to higher maximum temperatures, essential for searing.
- Grates Material: Porcelain-enameled cast-iron grates are excellent heat conductors and retain heat well, contributing to superior sear marks.
- Temperature Control: Precise temperature controls allow you to achieve and maintain the optimal searing temperature.
Top Electric Grills Known for Excellent Grill Marks
Several electric grills stand out for their ability to deliver impressive grill marks, combining power with intelligent design.
- Weber Lumin Electric Grill: This grill has been praised by experts for its ability to produce satisfying sear marks. It reaches high temperatures, up to 315°C (599°F), quickly, and features porcelain-enameled, cast-iron grates that excel at heat retention and transfer.
- Weber Q 1400 Electric Grill: A popular choice for its robust performance, the Q 1400 is known for its porcelain-enameled cast-iron grates and sturdy aluminum body, which ensure consistent heat for deep sear marks.
- Char-Broil SMART-E Electric Barbecue Grill: Utilizing TRU-infrared technology, this grill promises even heat distribution and can reach up to 370°C (698°F), making it highly effective for searing and achieving charring.
- Ninja Woodfire Electric Grill & Smoker: While celebrated for its smoking capabilities, this versatile grill also delivers on searing. It can handle sirloin steaks effectively, though it might struggle slightly more with charring burgers compared to its overall performance.
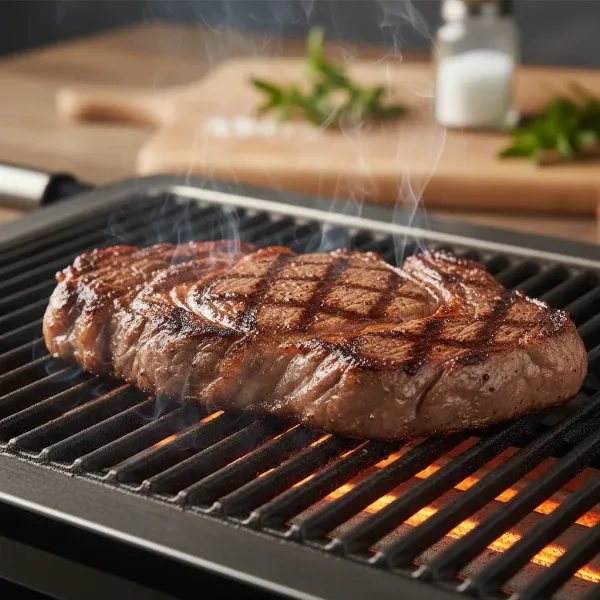 A close-up of a steak on an electric grill with perfect, dark crosshatch grill marks, smoke rising.
Beyond the Marks: Advantages and Considerations of Electric Grilling
While achieving grill marks is a key concern for many, electric grills offer a host of other benefits and a few unique considerations.
Advantages: Convenience and Cleanliness
Electric grills are incredibly convenient; simply plug them in and preheat. They offer indoor-outdoor versatility, allowing you to grill year-round without worrying about charcoal or propane. They are also known for being eco-friendly and virtually smokeless, making them ideal for apartments, balconies, and indoor use without setting off smoke alarms. Cleanup is typically straightforward, with non-stick surfaces and removable drip trays simplifying maintenance.
Considerations: Flavor Profile
One common point of comparison is flavor. Electric grills, by nature, do not impart the same smoky flavor profile as charcoal grills, which get much of their character from dripping fats hitting hot coals. However, many electric grills can still seal in flavor and char food well, creating delicious results. Some models, like the Ninja Woodfire, integrate wood pellets to introduce a smoky aroma, bridging this gap.
“Modern electric grills have evolved dramatically, offering not just convenience but also impressive cooking performance, including the ability to achieve those sought-after grill marks through precise heat control.” – Chef Maria Sanchez, Culinary Innovator and Electric Grilling Advocate
Essential Maintenance for Longevity and Performance
Proper care ensures your electric grill continues to deliver excellent results and those satisfying grill marks for years to come.
Regular Cleaning of Grates
After each use, once the grill has cooled slightly but is still warm, use a wire brush to scrub off any leftover food residue. For stubborn grime, a mix of warm water and dish soap works effectively. A clean grate not only prevents sticking but also ensures optimal heat transfer for future grill marks.
Drip Tray Management
Always ensure the drip tray is properly in place to catch excess grease and drippings. Empty and clean it regularly to prevent buildup and potential flare-ups.
Power Cord Safety
Always inspect the power cord for any damage or cuts before use. Place it away from heat and moisture, and avoid using extension cords, which can pose a fire hazard.
Conclusion
The pursuit of perfect grill marks doesn’t have to end when you switch to an electric grill. With the right knowledge of preheating, oiling, and strategic food placement, your electric grill can produce those visually appealing and flavor-enhancing sear marks just as effectively as its gas or charcoal counterparts. From indoor searing to convenient outdoor barbecues, electric grills continue to prove their versatility and capability, delivering delicious results with every use. So, are you ready to master the art of electric grilling and impress with stunning grill marks?
Frequently Asked Questions
What temperature do electric grills need to reach for good grill marks?
For effective grill marks, electric grill grates typically need to reach temperatures between 400°F and 550°F (204°C to 288°C), with some high-performance models exceeding this. Preheating for 10-15 minutes ensures the grates are sufficiently hot.
Can all electric grills make grill marks equally well?
No, not all electric grills are created equal for grill marks. Models with higher wattage, robust heating elements, and especially those with porcelain-enameled cast-iron grates, tend to achieve better, more consistent sear marks due to superior heat retention and direct contact.
How do I prevent food from sticking to the electric grill when trying to get marks?
To prevent sticking and promote crisp grill marks, lightly brush or spray a high smoke point oil directly onto the preheated grill grates. Avoid moving the food too early, as it will naturally release when a proper crust has formed.
Is the flavor different with electric grill marks compared to charcoal?
While electric grills can achieve excellent caramelization and Maillard reactions for flavor and grill marks, they typically don’t impart the same smoky flavor profile as charcoal grills. However, some electric grills, like the Ninja Woodfire, incorporate features to add a smoky essence using wood pellets.
How can I create crosshatch grill marks on my electric grill?
To create appealing crosshatch grill marks, first place your food on the hot grates and sear until distinct lines appear. Then, rotate the food 45 degrees and sear for another couple of minutes before flipping to the other side and repeating the process.