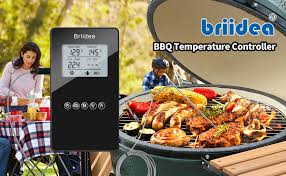
There’s nothing quite like the sizzle of steaks on the grill, the aroma filling the air, promising a delicious meal. But what happens when that promise is broken by a grill that’s either scorching your food to a crisp or barely warming it up? If you’re wrestling with a moody appliance, learning How To Fix Grill Temperature Control is your ticket back to barbecue bliss. It’s a common frustration, but don’t panic. More often than not, it’s a problem you can solve right in your own backyard.
As the team behind Electric Grill, we’ve seen it all. We understand that a reliable grill is the heart of any great cookout. Think of us as your trusted pitmasters, here to walk you through the troubleshooting process step-by-step. We’ll get your electric grill’s thermostat back in line so you can focus on what really matters: creating incredible food and memories.
Why Is My Grill Temperature All Over the Place?
First, let’s play detective. Understanding why your grill is misbehaving is the first step to a solution. An electric grill’s temperature regulation is a surprisingly simple system, which is great news because it means fewer things can go wrong.
The most common culprits behind erratic temperatures are:
- A Dirty or Faulty Temperature Probe: This is the sensor that tells the controller what the temperature is. If it’s covered in grease or has failed, it’s like trying to drive with a mud-splattered windshield—you’re not getting accurate information.
- A Malfunctioning Controller Unit: This is the brain of the operation. It receives information from the probe and tells the heating element when to turn on and off. If this unit is on the fritz, chaos ensues.
- A Damaged Heating Element: This is the muscle. While less common for it to cause fluctuations (it usually just stops working altogether), a damaged element can sometimes lead to inconsistent heating.
- Power Supply Issues: Something as simple as a faulty extension cord or a tripped circuit can cause the grill to lose power intermittently, leading to temperature drops.
Step-by-Step Guide: How to Fix Grill Temperature Control
Ready to get your hands a little dirty? Let’s walk through the process. Before you start anything, the golden rule of working with any electric appliance applies:
Safety First! Always unplug your grill from the power source before performing any inspection or maintenance.
Step 1: The Simple Power Check
It might sound obvious, but you’d be surprised how often this is the issue.
- Check the Plug: Ensure the grill’s cord is firmly plugged into the outlet.
- Test the Outlet: Plug another small appliance, like a lamp, into the same outlet to make sure the outlet itself is working.
- Inspect the Cord: Examine the entire length of the power cord and any extension cords for frays, cuts, or damage. An old, under-rated extension cord can often be the secret villain.
Step 2: Clean and Inspect the Temperature Probe
This is the number one cause of temperature control problems. The probe, often a small metal rod located near the grilling surface, gets covered in grease and carbon buildup.
- Locate the Probe: Find the small metal sensor inside the grill’s cooking chamber.
- Gently Clean It: Use a soft cloth or a non-abrasive sponge with a bit of warm, soapy water to gently wipe away all the grime. For stubborn buildup, a little bit of steel wool can work, but be gentle!
- Dry Thoroughly: Make sure the probe is completely dry before you plug the grill back in.
“I always tell home cooks to think of their temperature probe like a car’s thermometer. If it’s caked in mud, it can’t give you an accurate reading of the engine’s heat. A clean probe is essential for a perfectly cooked meal, every single time.” – Chef Amelia Thorne, author of “The Modern Griller”
Step 3: Inspect the Controller and Connections
The controller is the dial you use to set the temperature. It connects to the grill, usually with a set of prongs.
- Detach the Controller: Carefully remove the controller unit from the grill body.
- Check the Prongs: Look at the connection points on both the controller and the grill. Are they clean? Is there any corrosion or damage?
- Ensure a Snug Fit: When you reattach the controller, make sure it pushes on firmly and sits flush with the grill body. A loose connection is a common source of power interruption and temperature swings.
Step 4: Perform a Controller Reset
Sometimes, the internal circuitry of the controller just needs a simple reset.
- Unplug the Grill: Disconnect it from the power source.
- Turn the Dial: Turn the temperature dial to the highest setting.
- Wait: Let it sit for about two minutes.
- Turn Off: Turn the dial back to the “Off” position.
- Reconnect and Test: Plug the grill back in and test it. This simple cycle can sometimes clear a minor electronic glitch.
|
Our Picks for the Best Electric Grill in 2026
As an Amazon Associate I earn from qualifying purchases.
|
||
| Num | Product | Action |
|---|---|---|
| 1 | George Foreman 4-Serving Removable Plate Electric Grill and Panini Press, George Tough Non-Stick Coating, Drip Tray Catches Grease, Black |

|
| 2 | OVENTE Electric Sandwich Maker with Non-Stick Plates, Indicator Lights, Cool Touch Handle, Easy to Clean and Store, Perfect for Cooking Breakfast, Grilled Cheese, Tuna Melts and Snacks, Black GPS401B |
|
| 3 | Indoor Grill and Air Fryer Combo with Ceramic Accessories, 7-IN-1 Digital Display, 5.2 QT Electric Smokeless, 500°F Max, Large View Window, Roast, Bake & Dehydrate, Adjustable Temps, Easy Clean |
|
| 4 | Gourmia Smokeless Indoor Grill & Air Fryer with Recipe Book – Electric Grill for Indoor Use, 5‑in‑1 Countertop Cooker, Cast-Iron Grate, 1650W, Glass Lid, Dishwasher-Safe Plates |
|
| 5 | Presto 07061 22-inch Electric Griddle With Removable Handles, Black, 22-inch |
|
| 6 | BELLA XL Electric Ceramic Titanium Griddle, Make 15 Eggs At Once, Healthy-Eco Non-stick Coating, Hassle-Free Clean Up, Large Submersible Cooking Surface, 12\" x 22\", Copper/Black |
|
| 7 | Chefman Panini Press Grill and Gourmet Sandwich Maker Non-Stick Coated Plates, Opens 180 Degrees to Fit Any Type or Size of Food, Stainless Steel Surface and Removable Drip Tray, 4 Slice, Black |
|
| 8 | Chefman XL Electric Griddle with Removable Temperature Control, Immersible Flat Top Grill, Burger, Eggs, Pancake Griddle, Nonstick Extra Large Cooking Surface, Slide Out Drip Tray, 10 x 20 Inch |
|
| 9 | George Foreman® Fully Submersible™ Grill, NEW Dishwasher Safe, Wash the Entire Grill, Easy-to-Clean Nonstick, Black/Grey |
|
| 10 | bella Electric Griddle with Warming Tray - Smokeless Indoor Grill, Nonstick Surface, Adjustable Temperature & Cool-touch Handles, 10\" x 18\", Copper/Black |
|
When the Simple Fixes Don’t Cut It
If you’ve tried all the steps above and your grill is still acting up, the problem might be a bit more serious. This is where you might be dealing with a component that has failed and needs replacement.
How do I know if the heating element is bad?
A bad heating element usually won’t heat up at all, or it will have visible signs of damage, like blisters, cracks, or breaks. If only one part of your grill is getting hot, that’s another strong indicator that the element has a fault. Replacing a heating element can be a DIY job on some models, but always check your owner’s manual.
What if the controller itself is broken?
If the probe is clean, the connections are solid, and the heating element looks fine, the controller unit itself may have failed. Signs of this can include a display that won’t turn on, a dial that feels loose or broken, or a complete inability to regulate heat no matter what you do. Luckily, replacement controllers are often available directly from the manufacturer. It’s usually a simple plug-and-play replacement.
Prevention: The Best Way to Fix Grill Temperature Control
The best fix is avoiding the problem in the first place. A little regular maintenance goes a long way.
- Clean After Every Use: Don’t let grease and food particles build up. A quick wipe-down of the interior and the temperature probe after the grill cools down will prevent 90% of future issues.
- Proper Storage: Protect your grill from the elements. If you store it outside, use a high-quality, waterproof cover. Moisture is the enemy of electronic components.
- Regular Inspections: Once a month, do a quick check of the power cord, controller connection, and probe. Catching a small issue early can save you a big headache later. For a complete guide, check out our article on [how to clean your electric grill like a pro].
Frequently Asked Questions
Q: Why does my electric grill keep shutting off?
A: This is often a safety feature. It could be an overheating issue caused by a blocked vent or a faulty controller. It can also be caused by a poor power connection, like a loose plug or a tripped GFCI outlet. Start by checking your power source and ensuring the grill has proper airflow.
Q: Can I replace the temperature controller myself?
A: On most modern electric grills, yes. The temperature controller is typically a self-contained unit that plugs directly into the grill body. You can usually order a replacement from the manufacturer and simply swap it out. Always ensure the grill is unplugged before attempting this.
Q: Is it normal for my electric grill’s temperature to fluctuate a little?
A: Yes, a small amount of fluctuation is perfectly normal. The heating element cycles on and off to maintain the average temperature you’ve set. A swing of 15-20 degrees Fahrenheit is typical. However, wild, uncontrolled swings that burn or undercook your food indicate a problem.
Q: How accurate are the temperature dials on Electric Grills?
A: They are generally quite accurate for home use, but they can vary. For precision cooking, especially for smoking or low-and-slow cooking, many grill enthusiasts use a separate, high-quality digital grill thermometer to monitor the internal temperature for the most accurate readings.
Q: Can I test my temperature probe to see if it’s working?
A: Yes, you can test it with a multimeter if you’re comfortable with electronics. You would test for resistance (ohms). The resistance should change as the probe heats up. However, a simpler method is often just to visually inspect and clean it. If cleaning doesn’t work, and it’s the likely culprit, replacing it is an inexpensive and easy fix.
Mastering how to fix grill temperature control empowers you to be a more confident and capable griller. By following these troubleshooting steps, you can diagnose and solve most common issues without having to call a professional or, worse, buy a new grill. Remember, a well-maintained grill is a happy grill, and a happy grill means delicious, perfectly cooked food every time. So go ahead, get it fixed, and get back to grilling. We’re right here with you, celebrating every perfectly seared steak and juicy burger.
One thought on “How to Fix Grill Temperature Control: Your Ultimate Guide”