Few culinary experiences are as disappointing as biting into a dry, rubbery chicken breast after the promise of a perfectly grilled meal. Grilling chicken can be a delicate art, especially when dealing with lean cuts like the breast, which are notorious for losing moisture if not handled correctly. But what if you could consistently achieve juicy, tender, and flavorful grilled chicken breasts every single time? With the right preparation, technique, and a few expert tips, you can transform your grilling game from hit-or-miss to consistently delicious. This comprehensive guide will equip you with the knowledge to master the grill, ensuring your chicken breasts are always a succulent success.
Understanding Electric Grills and Why Chicken Dries Out
An electric grill offers a convenient and often healthier way to enjoy grilled foods, bringing the joy of outdoor cooking indoors or providing a consistent heat source for your patio. Unlike charcoal or gas grills, electric models use heating elements to directly heat the cooking surface, eliminating the need for open flames and making them ideal for apartments or areas with grilling restrictions. Their evolution has brought forth models with precise temperature controls and non-stick surfaces, making them user-friendly and easy to clean. Whether you’re using an indoor contact grill, an outdoor stand-up model, or a smokeless variant, the principles of even heat distribution and temperature management remain crucial.
The primary reason chicken breast often dries out on any grill, including electric ones, is simple: overcooking. Chicken breast is a very lean cut, meaning it has little fat to provide moisture. When exposed to heat, the proteins in the chicken contract and squeeze out moisture. The longer it cooks past its safe internal temperature, the more moisture it loses, resulting in that dreaded dry, tough texture. High heat, uneven cooking, and insufficient preparation also contribute to this common grilling woe.
Advantages and Disadvantages of Electric Grills
Electric grills have carved out a significant niche in the grilling world, offering distinct benefits alongside a few trade-offs.
Advantages:
- Convenience and Ease of Use: Electric grills are incredibly straightforward. Plug them in, preheat, and start cooking. There’s no charcoal to light or gas tanks to monitor, making spontaneous grilling sessions a breeze. Cleanup is also often simpler due to non-stick surfaces.
- Precise Temperature Control: Many electric grills offer exact temperature settings, allowing for consistent heat that helps cook food evenly and reduces the risk of overcooking, a critical factor for juicy chicken.
- Safety: Without open flames or charcoal, electric grills significantly reduce fire risks and the production of harmful carcinogens often associated with charring. They are also suitable for indoor use with proper ventilation, especially smokeless models.
- Versatility: From searing meats to grilling vegetables, electric grills can handle a variety of foods. Many compact models are perfect for small spaces like balconies or kitchen countertops.
- Healthier Cooking: Often designed with sloped surfaces and drip trays, electric grills can channel away excess fat, contributing to healthier meals.
|
Our Picks for the Best electric grill in 2026
As an Amazon Associate I earn from qualifying purchases.
|
||
| Num | Product | Action |
|---|---|---|
| 1 | Hamilton Beach Electric Indoor Searing Grill with Viewing Window & Adjustable Temperature Control to 450F, 118 sq. in. Surface Serves 6, PFAS-Free Removable Nonstick Grate, Stainless Steel |

|
| 2 | Chefman Electric Smokeless Indoor Grill w/ Non-Stick Cooking Surface & Adjustable Temperature Knob from Warm to Sear for Customized BBQing, Dishwasher Safe Removable Water Tray, Black |
|
| 3 | Electric Grill, CUSIMAX Electric Indoor/Outdoor Grill, 1600W Portable BBQ with Lid for Indoor & Outdoor Use, Adjustable Heat, Removable Stand Grill for Cookouts, BBQ Gatherings, Small Spaces |
|
| 4 | Electric Grill, Techwood Indoor/Outdoor Electric BBQ Grill, 1600W Portable Removable Stand Grill with Adjustable Heat & Drip Tray, Double Layer Design for Party, Patio & Backyard (Blue) |
|
| 5 | Chefman Smokeless Indoor Electric Grill, Extra Large Grilling Surface, Nonstick Table Top Grill for Indoor Grilling and BBQ with Adjustable Temperature Control, Drip Tray, Dishwasher-Safe Parts |
|
| 6 | Ninja DG551 Foodi Smart XL 6-in-1 Indoor Grill with Air Fry, Roast, Bake, Broil, & Dehydrate, Foodi Smart Thermometer, 2nd Generation, Black/Silver |
|
| 7 | Electric Grill, Techwood Indoor/Outdoor Electric BBQ Grill, 1600W Portable Removable Stand Grill with Adjustable Heat & Drip Tray, Double Layer Design for Party, Patio & Backyard (Black) |
|
| 8 | Chefman XL Electric Griddle with Removable Temperature Control, Immersible Flat Top Grill, Burger, Eggs, Pancake Griddle, Nonstick Extra Large Cooking Surface, Slide Out Drip Tray, 10 x 20 Inch |
|
| 9 | Ninja Griddle and Indoor Grill, 14’’, Electric Grill, For Steak, Burgers, Salmon, Veggies, and More, Pancake Griddle, Nonstick, Dishwasher Safe, 500F, Even Cooking, Silver, GR101 |
|
| 10 | Artestia 1800W Electric Outdoor Grills with Lid Indoor Smokeless Grill for Balcony with Temperature Control Portable Removable Stand Grill for Cooking, BBQ Party, Family |
|
Disadvantages:
- Flavor Profile: The lack of smoke or charring from open flames means electric grills typically don’t impart the same smoky flavor that many associate with traditional grilling.
- Reliance on Power Source: An electric grill requires an outlet, limiting its portability and outdoor placement unless an extension cord is used. Power outages can also halt your grilling plans.
- Searing Capability: While many models get hot enough to sear, some entry-level electric grills may struggle to achieve the intense, quick sear that creates a perfect crust on certain meats. This can affect the texture and appearance of grilled items.
- Capacity: Smaller electric grills may not be suitable for cooking large quantities of food, which can be a limitation when entertaining larger groups.
Key Factors for Selecting an Electric Grill (Buying Guide)
Choosing the right electric grill depends on your lifestyle, cooking habits, and space. Consider these factors to find your perfect match.
Type of Electric Grill:
- Indoor Electric Grills: These are compact and designed for countertop use. They often feature contact plates that cook both sides of the food simultaneously, like panini presses. Ideal for quick meals, small portions, and year-round grilling, regardless of weather.
- Outdoor Electric Grills: Larger, often stand-alone units resembling traditional gas grills. They are perfect for patios or decks where open flames aren’t allowed or preferred. They provide more cooking surface and are great for entertaining outdoors without the hassle of charcoal or propane.
- Smokeless Electric Grills: A sub-category, often indoor, specifically designed to minimize smoke production. They typically incorporate water trays or advanced airflow systems to capture smoke and grease, making them truly suitable for indoor kitchen use without setting off smoke alarms.
Size and Power:
- Size: Consider how many people you typically cook for and your available counter or outdoor space. Compact indoor grills are great for 1-2 people, while larger outdoor models can feed a family or small gathering.
- Wattage (Power): Higher wattage (e.g., 1500W or more) generally means faster preheating and higher maximum temperatures, which is crucial for achieving a good sear. Lower wattage models might take longer to heat up and recover temperature during cooking.
Material:
- Grill Plates: Look for durable materials with a high-quality non-stick coating. Cast iron with a non-stick layer offers excellent heat retention and even cooking. Ceramic coatings are also popular for their non-stick properties and durability.
- Body/Housing: Stainless steel offers durability and a sleek look, while high-grade plastics can make the grill lighter and more affordable. Ensure the materials are heat-resistant and easy to clean.
Features:
- Adjustable Temperature Control: This is perhaps the most critical feature for versatility and preventing overcooking. Precise control allows you to cook various foods at their optimal temperatures.
- Timer: Some advanced models include timers, which can be helpful for specific recipes.
- Drip Tray: An easily removable and washable drip tray is essential for collecting grease, promoting healthier cooking, and simplifying cleanup.
- Non-stick Surface: A high-quality non-stick coating prevents food from sticking and makes cleaning effortless.
- Removable Plates: Grill plates that can be easily detached and are dishwasher-safe significantly streamline the cleaning process.
- Lid: A hinged lid (especially on outdoor models) helps retain heat and moisture, allowing food to cook more evenly.
Brand and Price:
- Reputable Brands: Brands known for their kitchen appliances often offer reliable electric grills. Research customer reviews for insights into performance and longevity.
- Price vs. Features: Higher-priced models often come with advanced features, better materials, and more precise controls. Determine which features are essential for your needs and choose a model that offers the best value within your budget.
Expert Tips for Using an Electric Grill to Avoid Dry Chicken Breast
Achieving perfectly juicy grilled chicken on an electric grill is entirely possible with the right approach. Here are the secrets to success:
- Even Thickness is Key: Chicken breasts often have one thicker end and one thinner end. Pound them to an even ½ to ¾-inch thickness using a meat mallet or a heavy pan. This ensures the entire breast cooks at the same rate, preventing the thinner parts from drying out while the thicker parts finish cooking.
- Brine or Marinate: This is your best defense against dryness.
- Brining: A simple saltwater solution (1/4 cup kosher salt to 4 cups water, plus optional sugar and aromatics) helps the chicken retain moisture. Soak for 30 minutes to an hour for optimal results.
- Marinating: Marinades containing oil, acids (like lemon juice or vinegar), salt, and seasonings not only add flavor but also tenderize the meat and help lock in moisture. Marinate for at least 30 minutes, or up to 6 hours for deeper flavor. Avoid over-marinating with highly acidic ingredients, as this can make the chicken mushy.
- Bring to Room Temperature: Let your chicken sit out for 20-30 minutes before grilling. This allows for more even cooking, as cold chicken hitting a hot grill can lead to a dry exterior before the interior is cooked through.
- Preheat Thoroughly: Just like any grill, an electric grill needs to be fully preheated to its target temperature (typically medium-high, around 375-450°F). This creates a good sear, which helps seal in juices.
- Pat Dry Before Grilling: Even if marinated, gently pat the chicken breasts dry with paper towels just before placing them on the grill. Excess surface moisture creates steam, which prevents a good sear.
- Don’t Overcrowd the Grill: Cook in batches if necessary. Leaving space between pieces allows for proper air circulation and consistent heat, ensuring an even cook and better searing.
- Monitor Internal Temperature (The Golden Rule): This is the most crucial step. Use an instant-read meat thermometer. The safe internal temperature for chicken is 165°F (74°C). However, due to “carryover cooking” (where food continues to cook after being removed from the heat), pull the chicken off the grill when it reaches 155-160°F (68-71°C). It will safely reach 165°F during the resting period.
> “The secret to juicy grilled chicken is understanding carryover cooking. Remove your chicken when it hits 155°F, and let it rest; it will reach the perfect 165°F and stay incredibly moist.” – Chef Rich Parente, Owner of Clock Tower Grill - Rest the Chicken: Once removed from the grill, immediately transfer the chicken to a clean plate or cutting board and tent it loosely with foil. Let it rest for at least 5-10 minutes. This allows the juices, which have been pushed to the center by the heat, to redistribute throughout the meat, resulting in a much juicier piece of chicken. Skipping this step is a sure way to end up with dry meat.
- Avoid Excessive Flipping: Flip the chicken only once or twice. Too much movement prevents a proper sear and can lead to uneven cooking.
- Use Indirect Heat if Applicable: Some outdoor electric grills allow for two-zone cooking (one hotter, one cooler). If grilling thicker breasts, you can sear them over direct high heat for a minute or two per side, then move them to a cooler, indirect heat zone to finish cooking gently, preventing the exterior from drying out while the interior cooks.
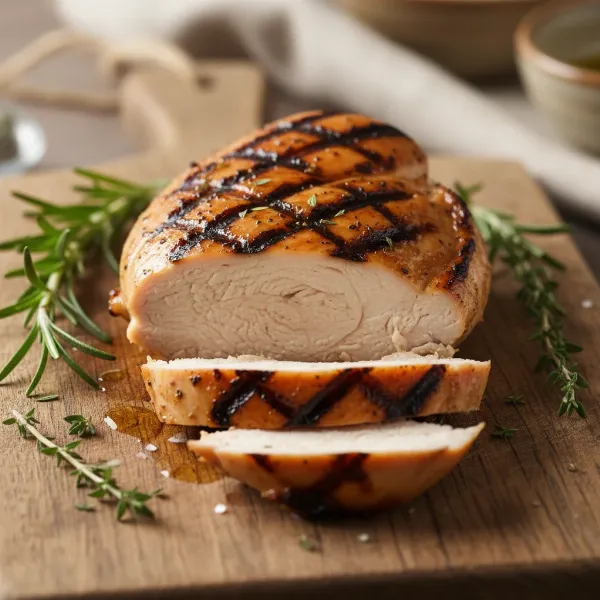 A perfectly grilled, sliced chicken breast showing its juicy interior on a cutting board.
Troubleshooting Common Electric Grill Problems for Chicken Breast
Even with the best intentions, you might encounter issues. Here’s how to address them:
- Chicken Sticking to the Grill: Ensure your grill plates are clean and thoroughly preheated. Lightly oil the chicken breasts themselves (not necessarily the grates, which can cause smoking) before placing them on the hot surface.
- Uneven Cooking: This is often due to unevenly thick chicken breasts or hot spots on your grill. Pounding chicken to uniform thickness is the primary solution. If your grill has noticeable hot spots, rotate the chicken halfway through cooking.
- Exterior Burning Before Interior is Cooked: This indicates the grill is too hot, or the chicken has too much sugar in its marinade, causing quick caramelization/burning. Reduce the heat slightly, or if using a sugary marinade, apply it only in the last few minutes of cooking. Consider using indirect heat if available.
- Still Dry Despite Efforts: Re-evaluate your internal temperature monitoring. Are you pulling the chicken early enough (155-160°F) and resting it properly? Ensure you’re not cutting into it too soon. If using a very thin breast, reduce cooking time significantly.
Conclusion
Grilling a truly magnificent chicken breast—one that’s bursting with flavor and unbelievably juicy—is not an elusive dream. By understanding the common pitfalls and applying the proven techniques outlined in this guide, you can confidently turn out perfectly grilled chicken every time, even on an electric grill. The keys lie in meticulous preparation, vigilant temperature management with a reliable thermometer, and the essential resting period. So, preheat your electric grill, prepare your chicken, and get ready to enjoy moist, tender, and flavorful meals that will impress everyone at your table.
What’s your favorite marinade to ensure a juicy grilled chicken breast? Share your secrets!
Frequently Asked Questions
What internal temperature should grilled chicken breast reach?
The safe internal temperature for chicken breast is 165°F (74°C). However, for maximum juiciness, it’s recommended to remove the chicken from the grill when it reaches 155-160°F (68-71°C), allowing it to finish cooking to 165°F during the resting period due to carryover heat.
How long should I marinate chicken breast for grilling?
Marinating chicken breast for at least 30 minutes significantly enhances flavor and moisture. For deeper flavor and tenderness, marinate for 2 to 6 hours. Avoid marinating for more than 12 hours, especially with highly acidic marinades, as this can break down the meat too much.
Why is pounding chicken breast important before grilling?
Pounding chicken breasts to an even thickness ensures that all parts of the meat cook uniformly. This prevents thinner sections from overcooking and drying out while waiting for thicker sections to reach the safe internal temperature, leading to a consistently tender and juicy result.
Should I rest grilled chicken breast?
Absolutely! Resting grilled chicken breast for 5-10 minutes after removing it from the grill is crucial. This allows the internal juices to redistribute throughout the meat, preventing them from escaping when you slice it and ensuring a much juicier and more flavorful experience.
Can I use an electric grill to achieve good grill marks?
Yes, most modern electric grills are capable of producing appealing grill marks. Ensure the grill is fully preheated to a medium-high temperature (around 400-450°F or 200-230°C) before placing the chicken. Avoid moving the chicken too soon, allowing enough time for the marks to form.